Floor
Diary 2013.6.29
投稿者:itoi+ru-san
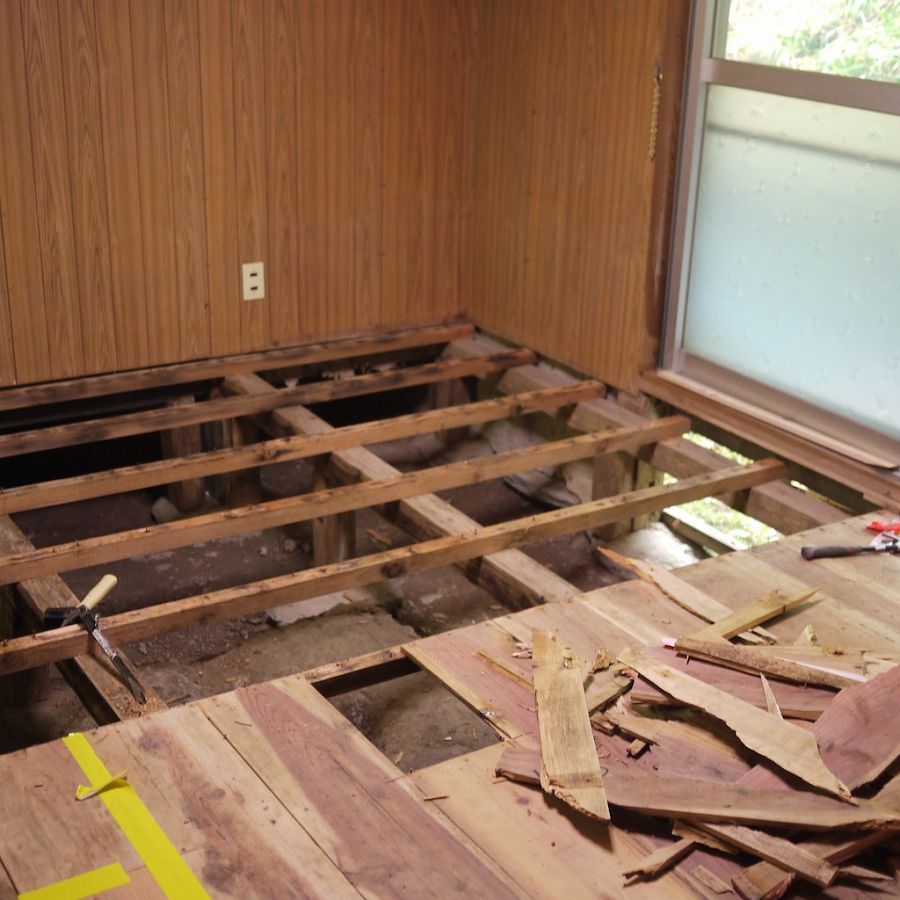
Built a floor in the back room, next to the kitchen. Replaced the old floor entirely because it had dry-rot and the boards couldn’t support the weight of a normal human.
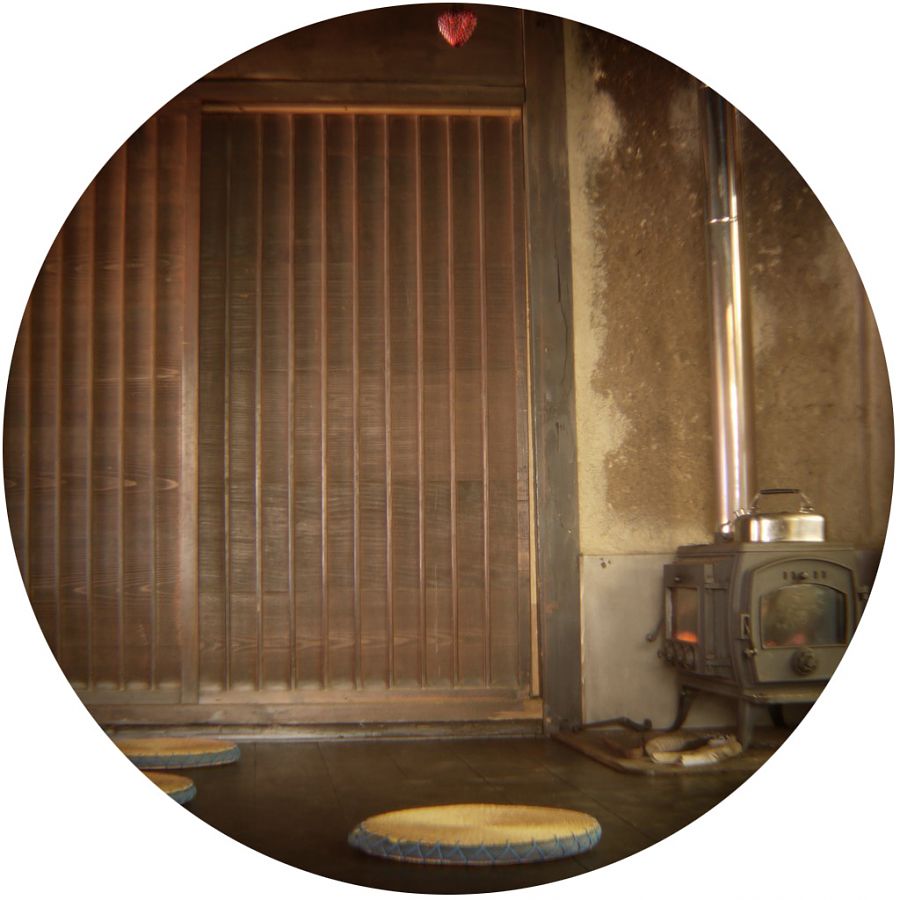
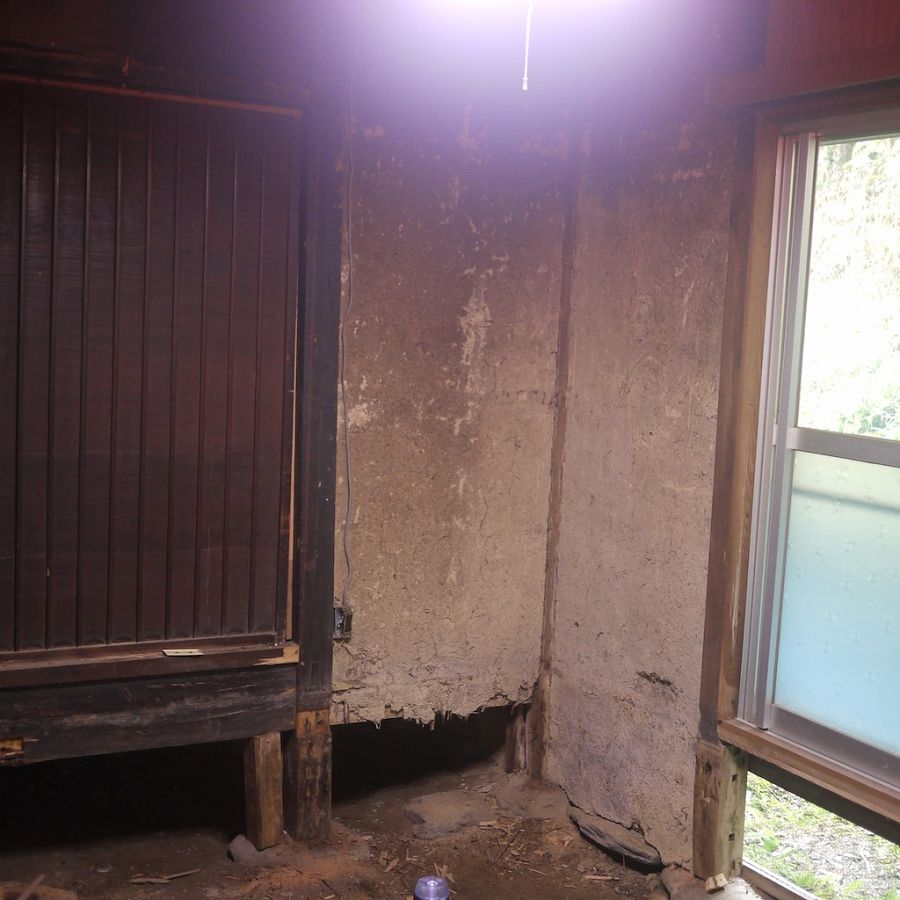
Originally, this room had disgusting mould problems. According to the design and materials used in the room it had probably been renovated in the early 1980’s. The wall coverings: imitation wood/plastic overlay; the ceiling: asbestos boards; the floor: shit tatami (cardboard and polystyrene). Metal and glass replicas replaced the original shoji screens and underneath all this the floor was disintergrating: basically it was an inedible cheese room.
1. Removal of old boards and tatami mats.
2. Removal of wall coverings/patching mud walls
3. Rebuilding floor.
4. Installing wood stove.
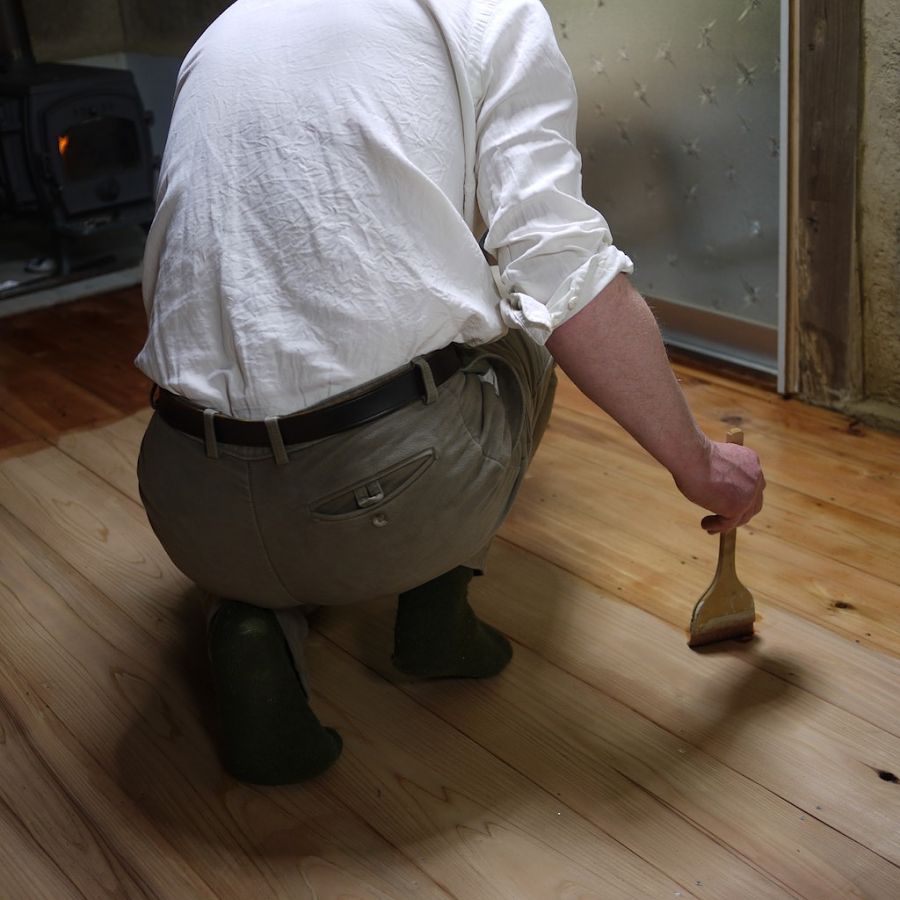
5. Coating floor.
7. And, I guess, cleaning.
ONE
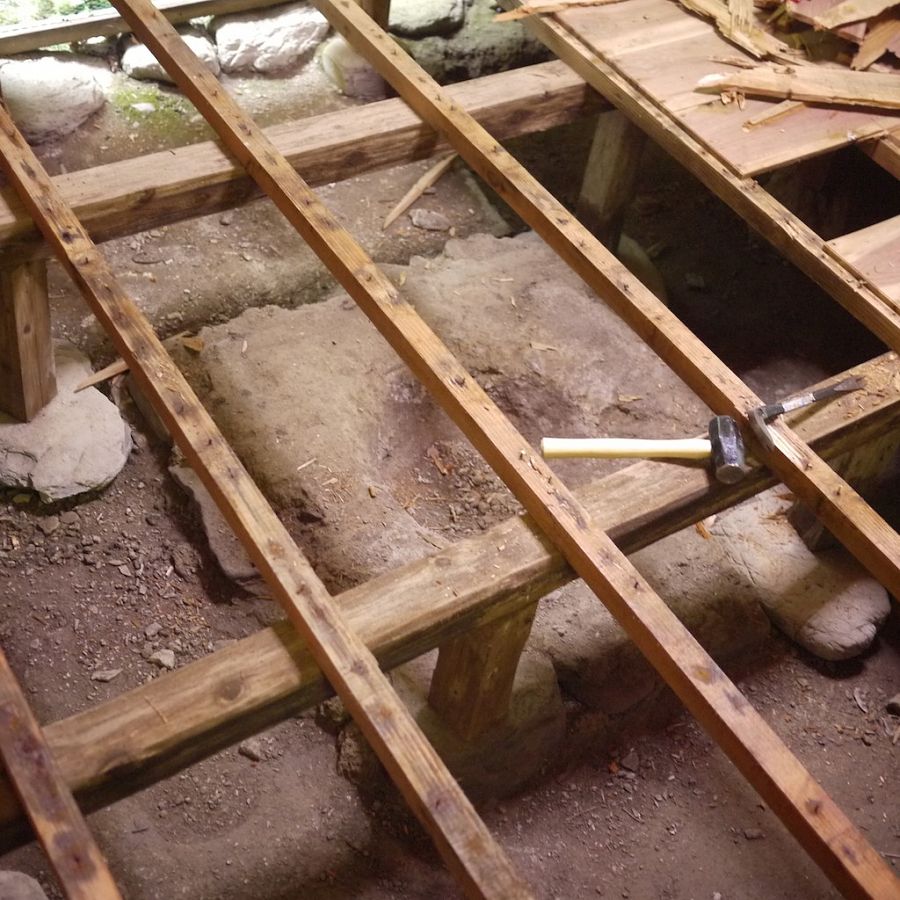
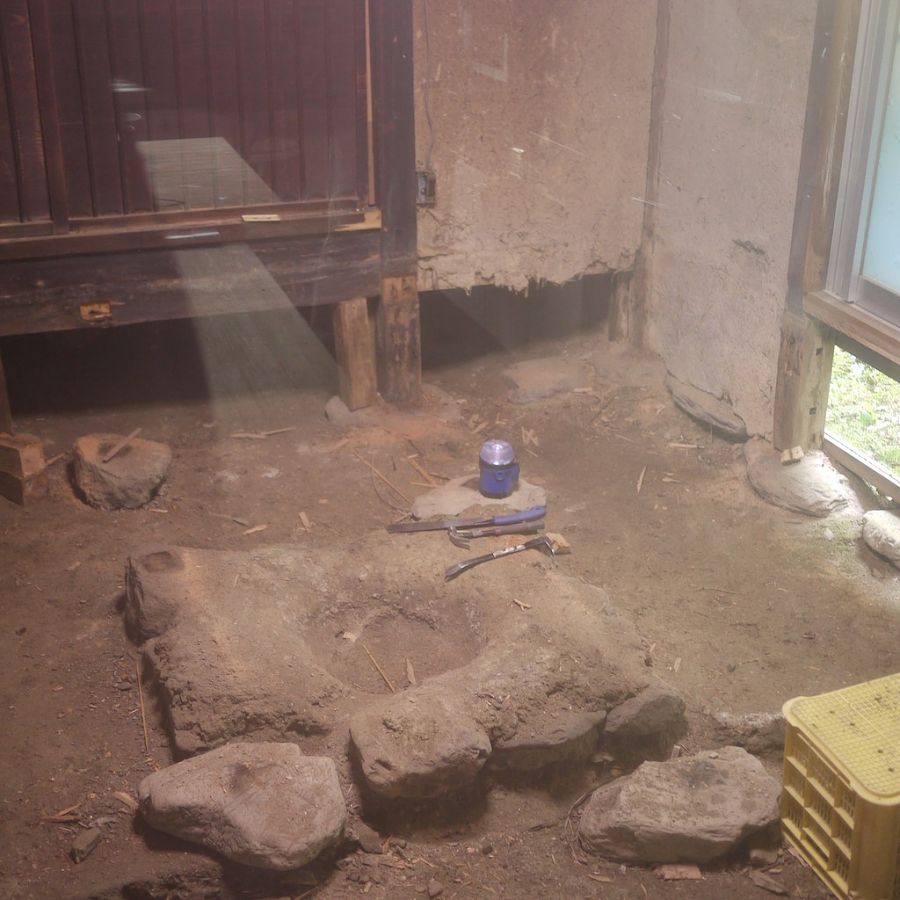
Tatami are difficult to get rid of. Storage is the easiest solution for the moment. Stacked in the garage. The boards had to be removed carefully since dry-rot is a fungus and releases spores. We burnt all the wood and joists. Beneath the floor you could now see the original irori built out of mud and rocks. Originally this room would have also been an earthen floor, like the kitchen area and the entrance hall. Considered reinstating it but we were going to install a wood stove in that room and we preferred to imagine it preserved under the floor.
TWO
The wall coverings came away easily. Mounted on wooden batons laid across the upright posts and mud walls. The mud walls had a beautiful gradient from a sandy colour at the bottom to a sooty black at the top. We patched the holes and gaps with fresh mud from up on the hillside. Mixed it with some straw and some little pebbles. Brushed the mud to feather the join between new and old.

THREE
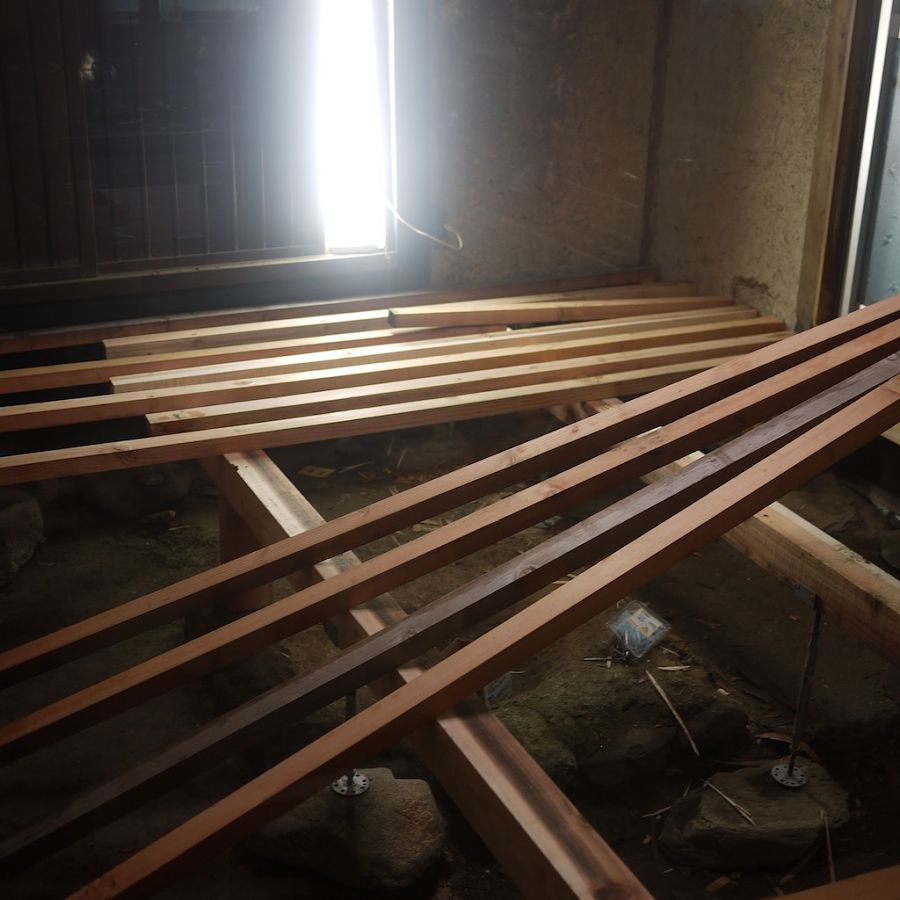
The most difficult bit. The whole house is squint and how do you find a level with no tools in a house that has three different levels? Call your friend the carpenter. He came and brought wood and got the level very efficently. Not perfectly, but close enough. Once we had the level we could put the big joists in and everything else was fairly straight forward. The legs supporting the joists had been wood propped up on stones, like the rest of the house. But we replaced these with adjustable metal legs. A great solution for a damp house.
FOUR
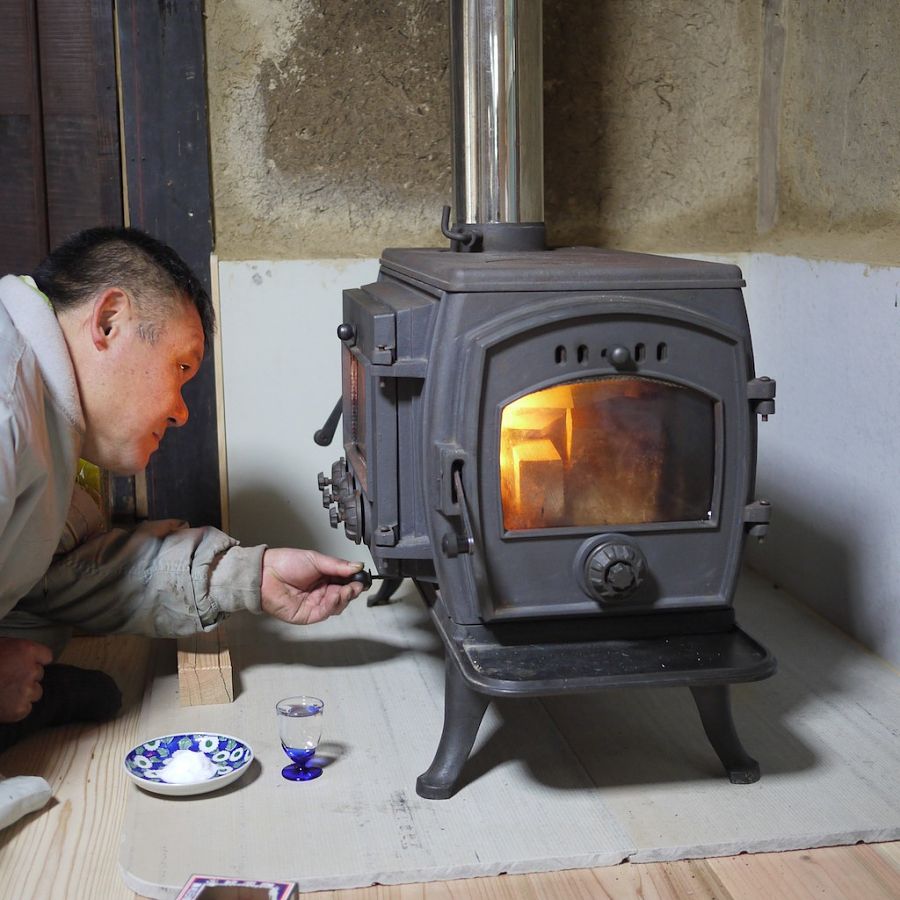
Installing the stove. Heatproof floor and wall coverings. Cut hole in mud wall install square bracket and fit metal cover. Plumb in the chimney and attach to roof. Height of chimney double the lateral span for good draft. Cleaning access necessary. Test and perform ceremony with salt.
FIVE
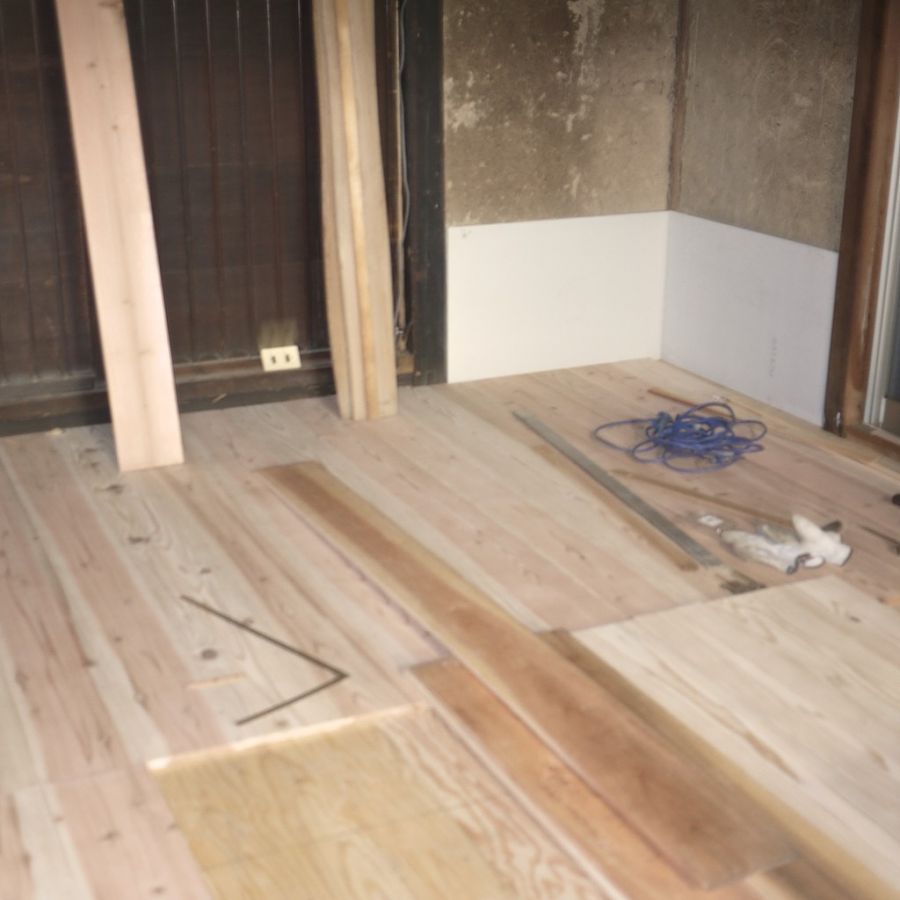
Once the framework had been laid, the boards could go on. Tried numerous floor coatings: persimmom juice, which was too red; grey paint, which was too sterile; Iron Oxide and wax, which looked beautiful but came off on your socks. Now, it must be removed by hand with a scrub and water. When it’s gone, another floor coating – a stain and oil based wax. Should have started with that.
SIX
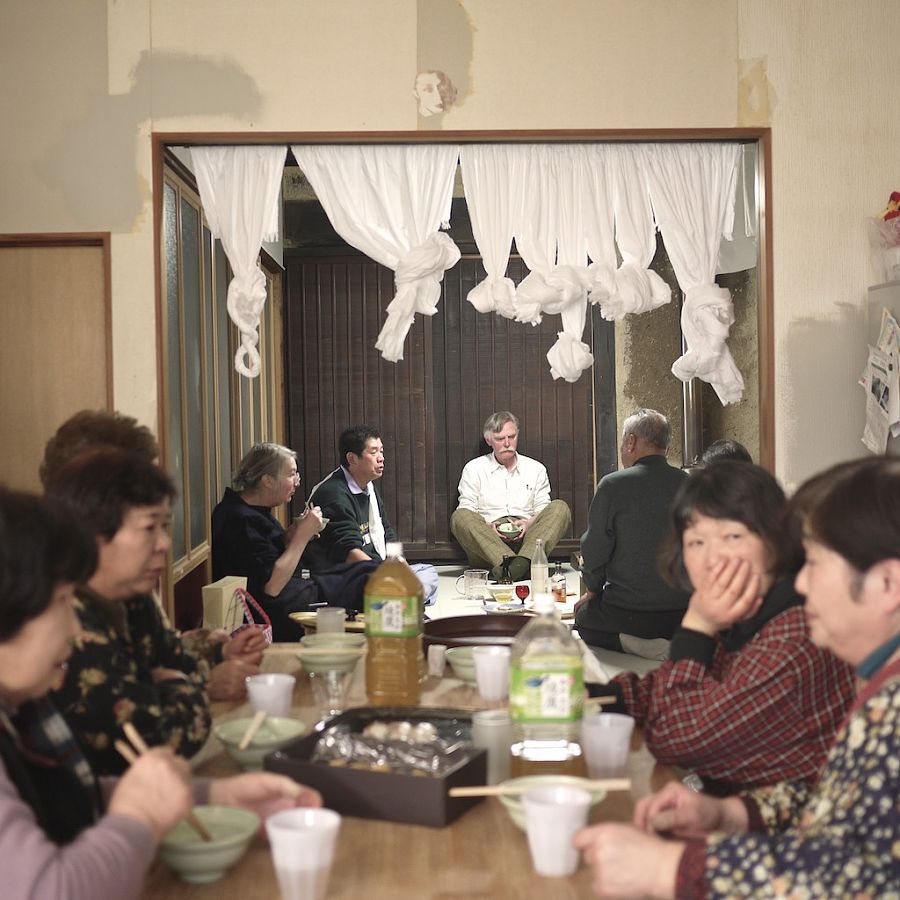
Cleaning.

Warming party.

itoi+ru-san
Itoi-san - Kanuma soil. Likes salmon sashimi, dislikes entrails of sea cucumber. Ru-san - Lancashire hotpot. Creative type. Likes being outdoors. Dislikes status. Together we are ITOI ARTS a project in divergent creativity in the mountains of Shikoku, Japan. 四国の山奥、多様な創作、アートとは。 //イベント時のみオープン// \\ふだんはただの家//
Articles by itoi+ru-san
To comment
コメントを残す
“Diary”Latest bulletin
“Diary” archives


- Aki Rika (12)
- Chan (11)
- Claire Tanaka (3)
- Folklore and History (1)
- Karin van der Molen (13)
- Rakuon Rakujitsu (1)
- Taste of Kamiyama (4)
Comments